
|
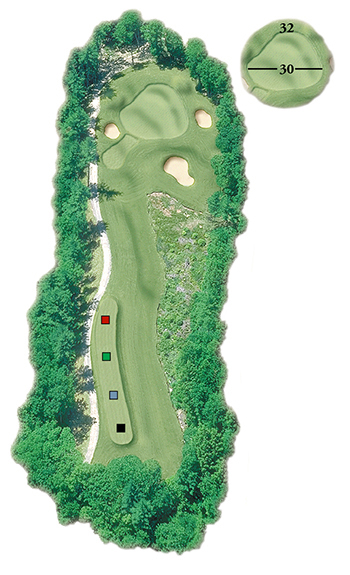
This beautiful, but deceptive Par 3 requires a careful club selection. It will penalize the player that doesn't manage the distance. The wide 2-tiered green slopes markedly from right to left and places an even higher premium on shot placement. The carry is more than you think!
Click on the picture below for a "flyover view" of the 3rd hole...

|
 |